The #1 Document Management Integration for NetSuite.
Turn Every NetSuite Record Into a Complete Audit-Ready File.
Make every NetSuite record complete, compliant – and defensible.

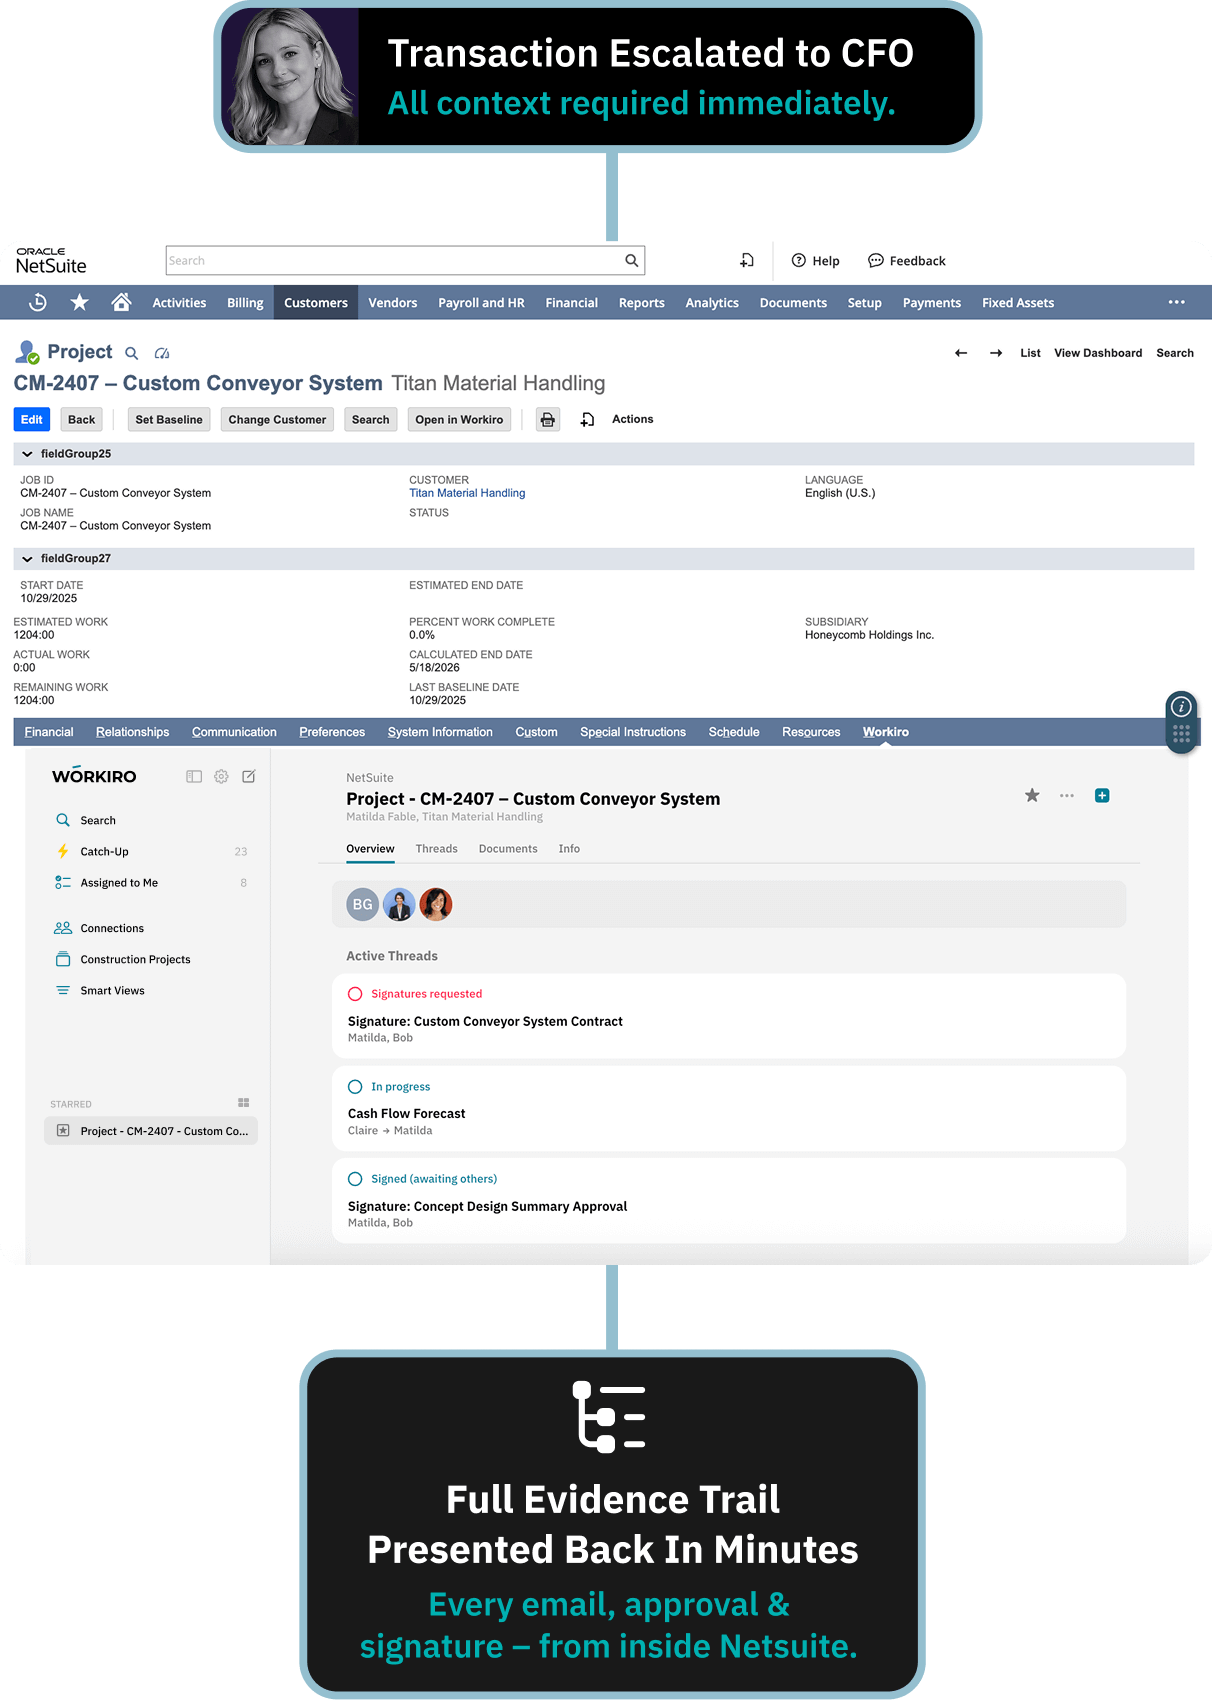
Answer Any NetSuite Transaction Question in Seconds.

In-Record Visibility: View documents and signatures directly inside the NetSuite record.
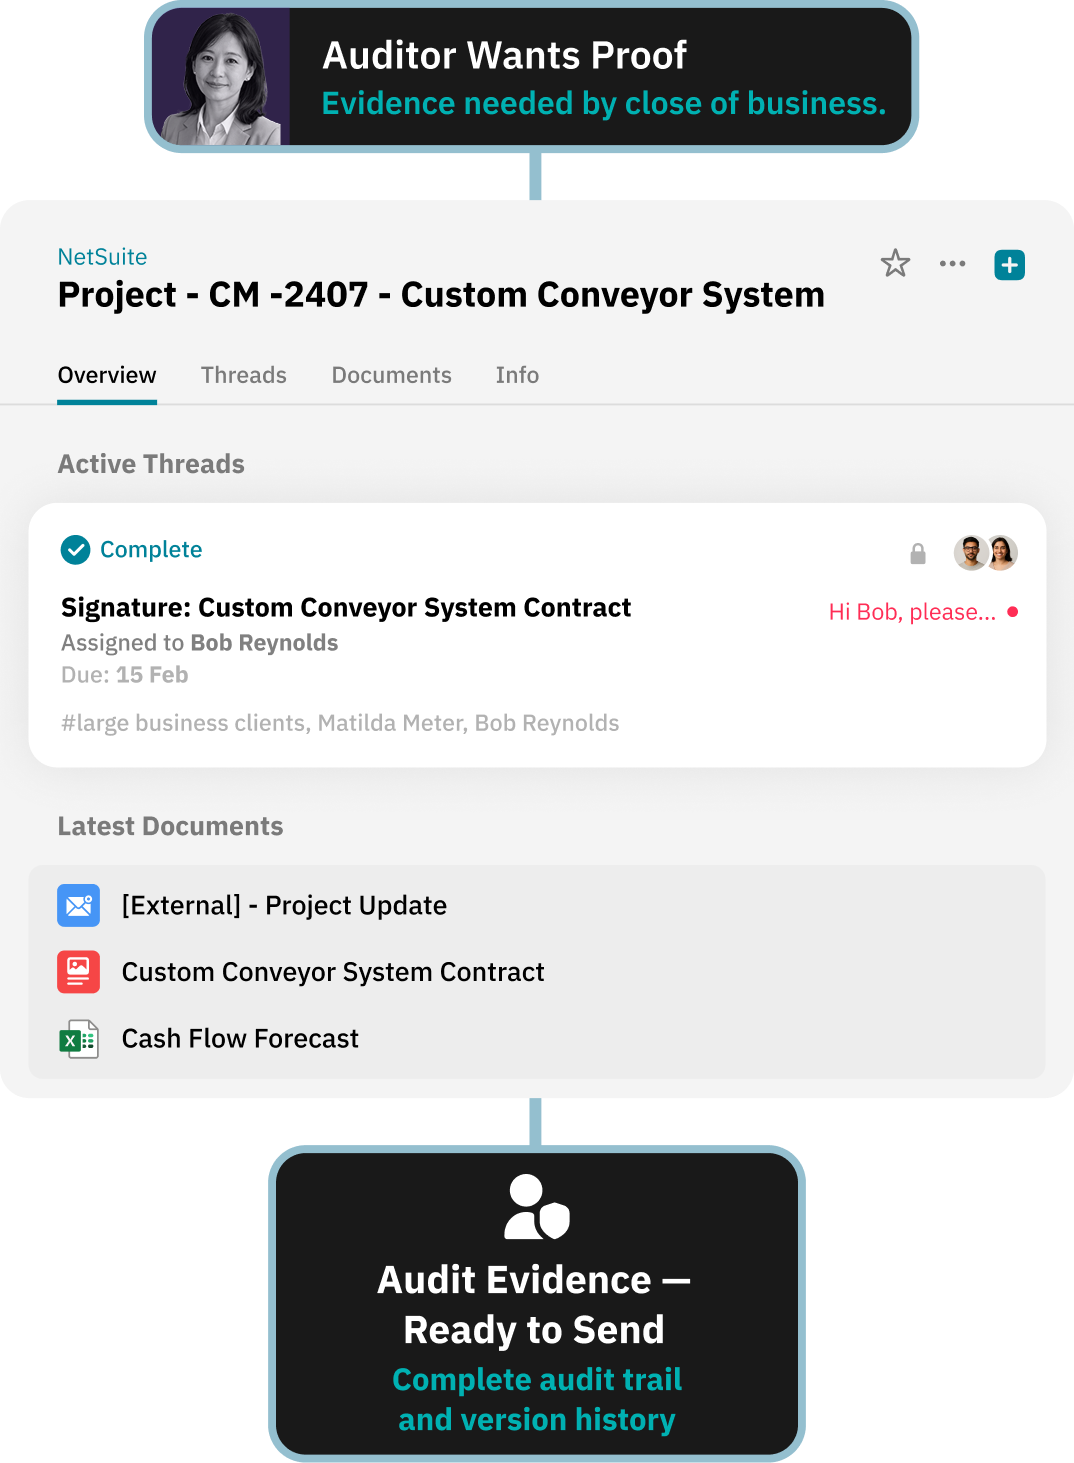
Automatic Audit History: Maintain version control and time-stamped approvals by default.
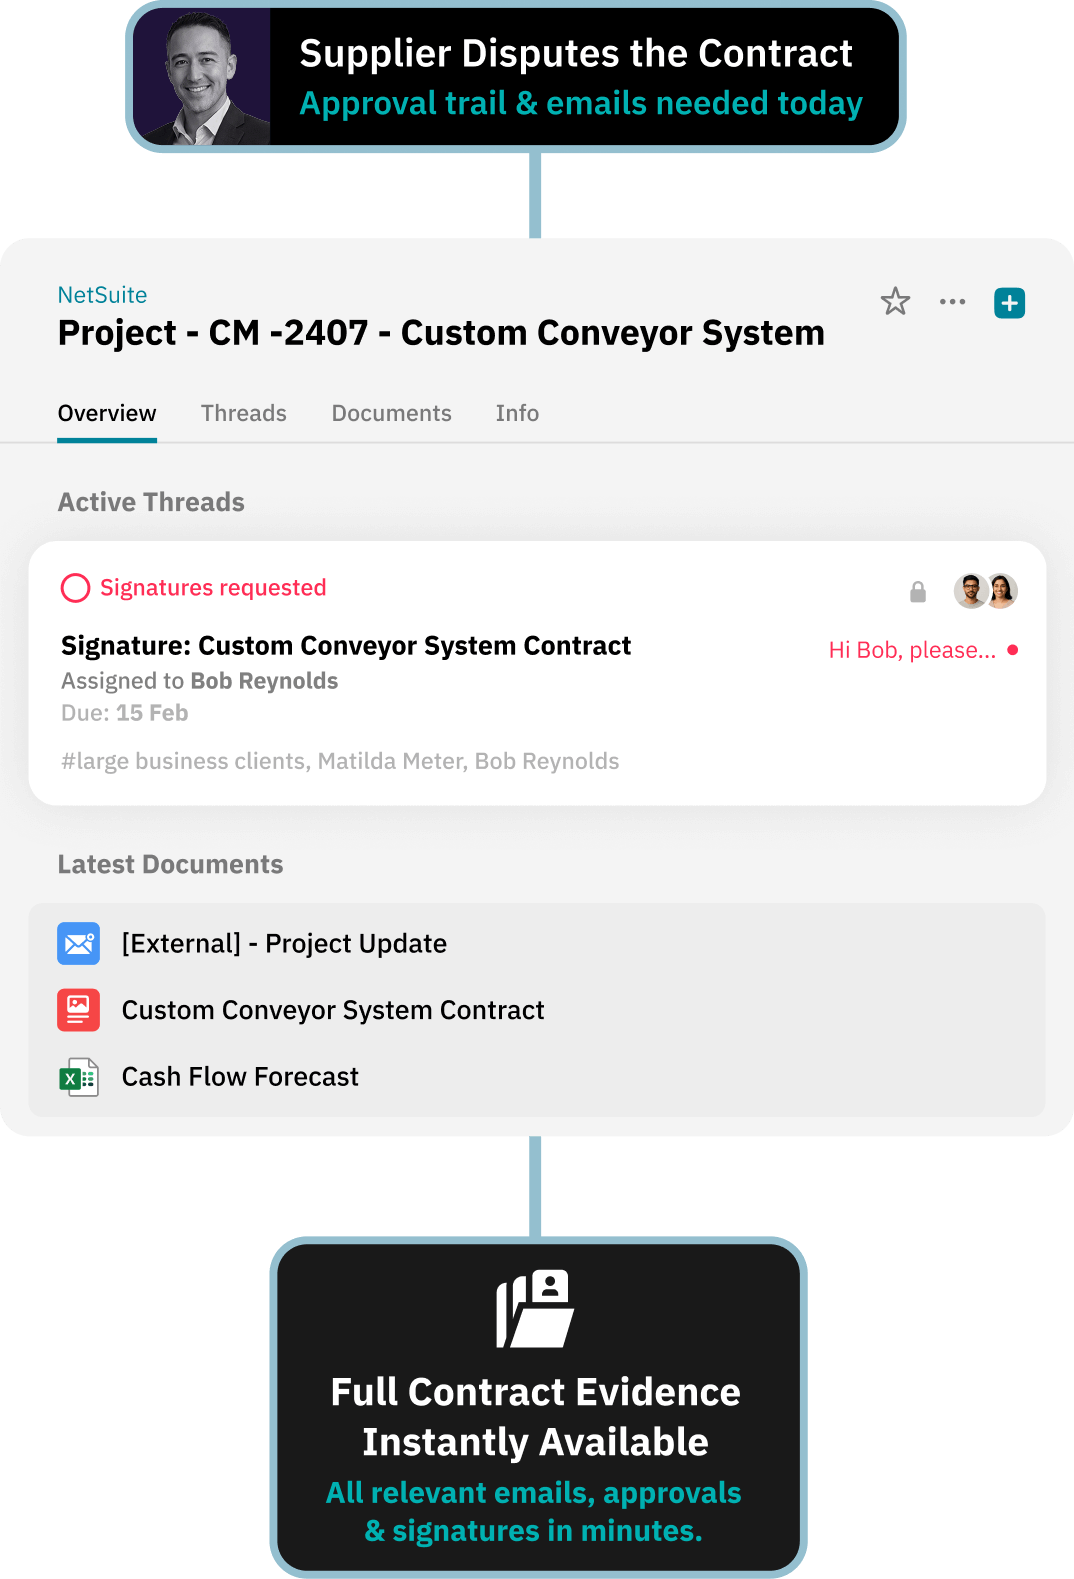
Email Capture: File conversations against the correct transaction automatically.
Embedded Approvals: Send for approval or signature without exporting.
Single Source of Truth: Keep every document tied to the right record.


Embedded Inside NetSuite
Full Context: Documents & collaboration inside NetSuite record
Real-Time Status: Task and signature updates shown instantly
No System Switching: Everything stays inside NetSuite
Full Decision Trail
Version History: Every change retained automatically
Time-Stamped Approvals: Clear, defensible sign-off records
Signed & Stored: Contracts and approvals kept together
Complete Timeline: Every action captured and time-stamped
Communication Captured
Automatic Filing: Emails and attachments stored instantly
Correct Record Linking: Attached to the right entity, transaction, or custom record
No Lost Evidence: Nothing stuck in personal inboxes
NetSuite for Workiro demo


NetSuite Without Workiro
Records exist.
Context doesn’t.
• Documents stored without record context
• Approvals handled in email and separate tools
• Signatures exported and re-uploaded
• Audit trail incomplete or manual

NetSuite After Workiro
One source of truth
— inside NetSuite.
• Documents & emails tied to the right record
• Version history and full audit trail by default
• Approvals & eSignatures from within NetSuite
• Secure external collaboration without workarounds
See the difference

More Than File Storage. Move Work Forward — Faster
Office docs collaboration in NetSuite (Word, Excel, PowerPoint)
PDF markup and collaborative review
Tasks assigned with clear ownership
Approvals tracked end-to-end
Audit-ready eSignatures
Status written back to NetSuite automatically


Collaborate With Anyone — Without Buying More NetSuite Licences
Customers sign securely – no login required
Suppliers upload in context – against the right record
Internal teams collaborate – without licence creep
External users stay outside NetSuite – but inside the audit trail
Every action is recorded automatically
Instant Answers for Audit & Compliance. The Evidence Trail — On Demand
Every version preserved
Every signature certified
Every task owned
Every conversation time-stamped
NetSuite for Workiro demo
NetSuite and Workiro Frequently Asked Questions:
Keep Every Client File Defensible — Without Slowing Down.
Book a demo